


Best MIG Welder Within Budget
It was the nineteenth century when the MIG welder was invented. Since its invention, people have been using these widely. They are simple to use. But these are not as efficient as TIG machines. However, these can allow you to do complex jobs to make fabrication more affordable. This article can provide an elaborated buying guide with top products, and you can choose the best MIG welder from them.
What is a MIG Welder?
Metal Inert Gas welder is a Gadget that uses inert metal gas for large and thick materials. You should use a consumable wire suitable as both the electrode and the filler material.
How to Use the MIG Welder for Best Results:
Want to add a professional touch to your DIY project? The procedure is suitable in this case and allows you to make many practical applications like auto work, home repair, etc.
1) Know MIG Welding:
1) Understand first of all what the process is. People call it GMAW, invented during World War II. It is a quick portable method to generate robust joints. Recently, many stores have kept it for use and factory applications. However, home hobbyists and welding enthusiasts can use it also.
2) Ensure that you are aware of how the method works. It takes the help of a machine to feed a wire through a contact tip into a MIG gun, and the electrically charged contact tip helps to transfer the current to the wire.
The arc allows you to set it up between the wire and the base metal. In addition, use inert gas flows out of the gas nozzle to shield the process from the atmosphere.
You can see multiple modes of metal transfer like:-
Short circuit (thin metals)
Globular transfer (heavier metals)
Spray transfer (hottest)
3) You must realize the work. As soon as you learn how to use this device, it is possible to create repairs around the home. If willing, you should use it on stainless steel, mild steel, and aluminium. Whether you want, you may use shielding gases, and these rely on base metal and welding wire.
2) Preparing to Weld:
1) First, your task is assembling the Safety gear. You might require a whole set of safety equipment to ensure complete safety while welding. For instance, you can get masks, gloves, and protective clothing, and you must ensure that all skin is covered to prevent overexposure to UV rays.
You may need to use a mask with at least shade or darker as it can assist you in preventing arcs.
Do you work in any poorly ventilated areas? If yes, you must use a vapour mask to minimize the number of toxic vapours inhaled while welding.
You can wear gloves used to protect the skin from molten metal. In this case, you must use a CO2 extinguisher and a bucket of sand for emergency fires.
2) Now, select a comfortable gun of your choice. A few models are shaped like pistols, whereas other models appear as acetylene torches. The machine size depends on the project size.
You can use a gun that is water or air-cooled. Besides, you might take the help of air-cooled guns for 200 amps or less. You can manipulate these easily in small areas, and it is such a type which home types use generally.
3) Remember to make the area prepared to be welded in. Hence, you should remove the flammable material and look for an excellent surface to work on. Although it is possible to put the ground connection on the piece, most stores have a big metal workbench.
If other people exist, you must set up the curtains around the work area, and these can assist you in protecting them from UV damage.
3) Installing the Wire:
In this case, what you have to do is to get the correct wire. Then, your job is to use a similar wire type as the material you are using. For example, if you want to work with stainless steel, you must use stainless steel wire.
Regarding steel type, go with two major types of wires. First, choose AWS ER70S-3 because it is an all-purpose steel wire and is the most economical choice. Then, if you are willing, you can go with AWS ER70S-6, a high-quality steel wire. It is designed to work on rusty or dirty steel.
How to Install the Wire to the Guide:
If you use E71TGX, it needs no shielding gas. In addition, it is suitable for welding in high winds and painted or rusty materials. However, the wire’s diameter depends on the thickness of the metal. Hence, your job is to use wires of thin size for thin metals and thicker wires for thicker metals, and you might need a larger machine for thicker metals.
You have to prepare the reel after that. Hence, make the tension tighten on it to keep the wire secured from unravelling for its tension. To ensure and avoid tangles or damage to the line feeder, you must straighten the first 3 inches of the wire. Then, you may take the help of a wire cutter to trim the wire accordingly.
You must insert it into the guide tube and feed it over the roller. Next, you should insert the wire into the wire liner. The wire may not be adequately aligned if you are willing to use force.
Ensure that the wire is free from rust or grease causing bad welds. You might need to take the help of a dry cloth to clean any dirty wire before inserting it. In this case, you need to know that the wire becomes rusty if left in the machine while not in use. As soon as you insert the wire into the liner, your task is to power on the machine. Then, you have to take the help of the wire feed mechanism to push it through the machine.
Lastly, you are required to manage the tension. You must control the tensioner as soon as your wire is fed through. Having excessive tension causes the mountings to bend. As a result, it damages the machine. Remember that you must maintain the tension at a minimum amount enabling the line to be fed through. Ensure that you should check the tension on the reel and the line feeder. Keep in mind that both have to be as low as possible.
4) Making the Weld:
1) Your first task is to set its polarity to DCEP, reverse polarity.
2) After that, use a consistent electrode length. Next, you need to extend the electrode between ¼” and 3/8″ from the contact tube for a clean process.
3) Then, you need to use a proper shielding gas. Hence, your task is to use carbon dioxide as an economical choice. Thus, it can provide deeper penetration of steel. However, it is hot for thin metals. When you weld aluminium, you have to use argon. If necessary, use the mix of argon (75%) and carbon dioxide (25%) for thinner steel.
4) After that, use drag to weld a joint. If you want, you might go through the push welding technique. Ensure that the angle must not exceed 10 degrees in either technique. Remember that the wire must remain at the front edge of your weld pool. Thus, it gives you greater control over your weld.
Drag welding may pull the bead along with the tip, and it can offer deeper penetration and a narrower bead. Following the push, the process helps to push the bead with the tip; thus, you can offer a wider bead.
5) You can create a flat weld. Try to use a machine to place material directly into the joint. You might go through a back and forth method to fill significant gaps. When it comes to flat joints, your task is to hold the gun at a 90° angle.
6) You should create a horizontal weld. In this case, your job is to reduce the gun angle slightly to keep the filler from sagging. Now you need to maintain the similar push or pull angle as standard, and you need to take the help of e back-and-forth weave motion to fill significant gaps.
You are required to maintain the amperage the same as a flat weld. Sometimes, you might have to use a smaller diameter wire to prevent the weld pool from getting too big.
7) Now, create a vertical one. If you use thin material, your job is to begin at the top. After that, you must move it down with gravity, which can keep the arc from penetrating the material. If you are looking for thicker metals, you must begin at the base and work up after that, and it helps to boost penetration. You are willing to reduce the amperage by around 10-15% to help fight gravity.
8) after that, your job is to create an overhead one. Then, you can go with the standard welding techniques. Hence, you must boost the travel speed, preventing filters from falling out of the joint.
You might require it to boost the gas flow rate. Ensure to clean the nozzle because spatter will build up quicker in this case.
9) You just need to grind off any excess filter as soon as you finish the procedure. Hence, you need to grind it down if it is defective and do the process again.
What is the difference between other welders?
Stick: These need manually-fed electrode rods. You will find these messier because they create smoke and slag. Thus, it is possible to generate more waste than MIG.
Tig: This one is one of the most complex versions to learn, and the name can tell you that it uses tungsten. Hence, you should take the help of a tungsten rod, which won’t melt during the process and allows you to use it for thinner metals.
Mig: These machines use a spool of wire used to feed through automatically. As a result, you don’t need to use rods. Also, no smoke or slag exists, which becomes an extra benefit.
Shielded metal arc: We know the process as SMAW-like stick or flux core welding. It is an old method you can use in various names.
Best MIG Welder Within Budget:
1.) MILLER ELECTRIC MIG Welder
 Description: When it comes to quality, no manufacturer has more reputation than this. This product has many user-friendly features, making it a perfect option for professionals.
It comes with a 10 ft. M-10 MIG Gun, 10 ft. Work Cable with Clamp, preloaded Gas Solenoid Valve, Dual Gauge Regulator with Gas Hose, Sample Spool of 0.030 in. Solid Wire, 0.030 in. The overall width is 20-1/2 inches Standard, whereas the height is 12-1/2 inches.
Features:
Modes: You can use the model in two modes— gas or flux core using 110V or 220V current.
Fast setup: You only need to select gas or gasless, wire diameter, and metal thickness.
Technology: The model comes with a Smooth-Start technology that can form a protective shield before the beginning of the procedure. Thus, it can help you to offer smooth results. There are many high-end models which provide the feature.
Thickness: ⅜ inch is the maximum thickness of the machine, and it weighs only 38 pounds despite having robust construction. Although it is expensive, many professionals ask to buy the model.
Pros:
- Semi-auto setup
- Good duty cycle
Cons:
- Expensive
2) Weldpro 200 Amp Inverter Multi Process Welder
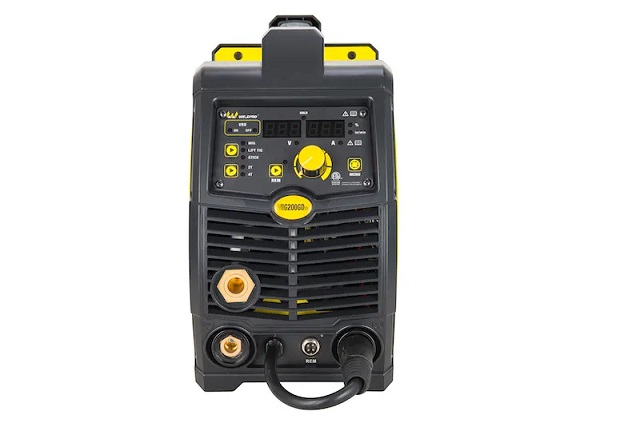 Description: The model is suitable for TIG, Stick, heavy-duty steel, and iron welding, especially outdoors. These features make it a multi-process machine, and it can provide both gas and flux core.
It comes with a dual digital display that is simple to read. You can set amperage and wire-speed for continuous welds. It can provide VRD high temp and overload protection with indication. In addition, it provides inductance settings that people can adjust easily. The package offers 10 ft. ERGOPLUS15 MIG torch, 13 ft. WP-17 TIG torch, 5awgx10 ft T-shape Earth clamp, 5awgx10 ft electrode holder, Cable35-50 quick connector 200a and Cable35-50 quick connector 300a. Besides, the package also comes with a Gas hose, Power adapter, Flow meter, Φ0.8/1.0V drive roller; 0.6-0.8/0.9 V drive roller; 0.8-0.9 knurled drive roller, and two contact tips of 0.030, 0.040 each.
Features:
Voltage: You can run the model on 110V, but it can generate full power at 220V. Hence, you can use a generator or a dedicated socket to offer the power.
Weight: The model weighs only a fraction over 30 pounds. Therefore, you can move it very easily.
Thickness: The maximum thickness is ¼ inch. It is available in a variable wire feed between 78 and 550 IPM.
Pros:
- Versatile
- Good portability
Cons:
- Full power needs a generator
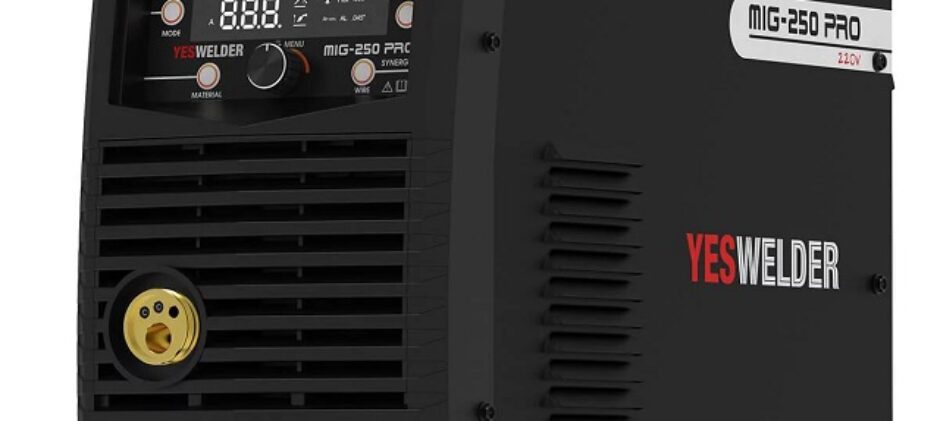
3) YESWELDER MIG-250 PRO Aluminum MIG Welder, 250Amp
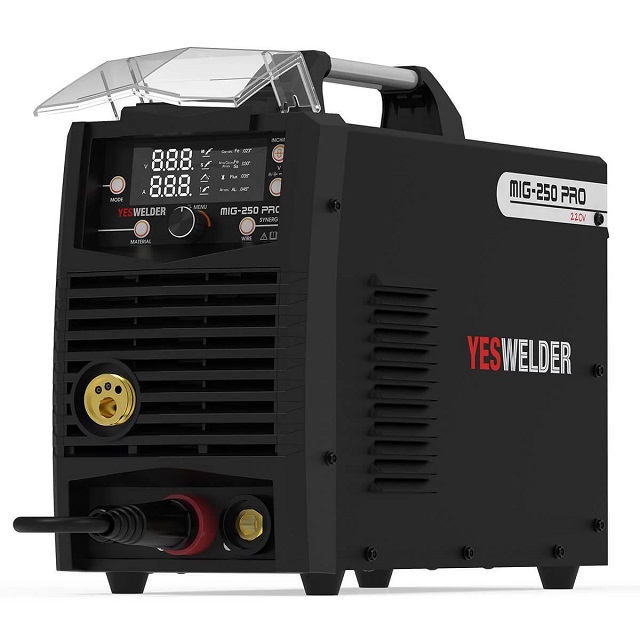 Description: Aluminium welding is hard to do. The reason is that the metal is comparatively soft. Besides, it can absorb heat quickly, indicating that you can not keep it hot for long. The robust model offers an effective solution.
This package comes with 10ft Mig Gun (with a Graphene liner), 10ft Electrode holder with cable, 10ft ground clamp with cable, Gas hose, W-type .030”/.035” roller driver, V-type .023”/.030” roller driver (.030”/.035” built-in ), U-type .035″/.045” roll driver, Hammer & Brush.
Features:
Thickness: The product can provide gas and flux-core modes and allow you to use it for an impressive ½ inch of mild steel. It can be used ⅜ inch maximum for aluminium as the manufacturer does not provide you with the exact size.
Duty cycle: It can provide a 60-per cent duty cycle at full power.
Voltage: The product needs a 220V supply. Besides, this model can use inverter technology to keep energy consumption low as possible.
Wire-feed speed: Its speed is between 79 and 590 IPM. Besides, the weight is 34 pounds. It has both TIG and Stick capability, but the TIG torch is extra.
Aluminum Wire Feeder: With the help of the top-quality aluminum wire feeder, you can get a stable welding experience in a much better way. You can use the product to weld stainless steel, mild steel, aluminum, etc. In the case of aluminum, you need to use a spool gun included in the package. However, you don’t have to buy it separately. It comes in transformer technology which is both reliable and long-lasting.
Spool Gun: It is essential for aluminum welding. The gun comes in 10 feet 4 inches long, 4-prong end connection, 1lb aluminum wire with dia. 0. 9 millimeters included.
Warranty: It provides 30 days refund and a 3-YEARS Limited Warranty. In addition, you can get a one-year NEW Replacement Warranty.
Wire Range: The range of wire required for solid steel is. 025″-. 030″ (0. 6-0. 8mm). On the flip side, wires required for Flux Cored come with .030″-. 035″ (0. 8-0. 9mm).
Accessories: The model includes a MIG torch, Aluminum Spool Gun, Ground Clamp Cable, Gas Hose, Argon Regulator, .023” (0. 6mm) & . 035” (0. 9mm), Contact Tips, Welding Mask, and Wire.
Pros:
- MIG, TIG, and stick capability
- Good duty cycle
- Reasonable
Cons:
- 220V only
4) LOTOS MIG175 175AMP MIG Welder with Free Spool Gun
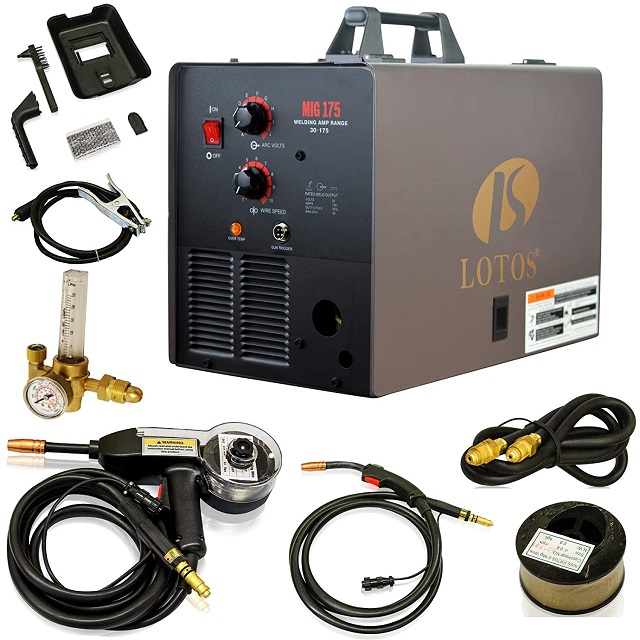 Description: If you are looking for a model that can provide competitive performance at an excellent value, the model is a great option in this case. You can do the welding work up to ¼ inch in steel or stainless and 3/16 inch in aluminium.
Features:
Accessories: All the credit goes to a dedicated spool gun. You can get the spool gun available in the kit. Besides, it includes a gas regulator, mask, chipping hammer, wire brush, and a roll of MIG wire.
Simple setup: You can set up the model easily. But it weighs 85 pounds. Therefore, it is a bit heavy. In addition, it comes with enough capabilities, which are helpful for some professionals. It can provide durability and offer a good value.
Duty cycle: It can provide a 20 percent duty cycle which is a bit limiting.
Pros:
- Mask is available with Spool gun
- Competitive price
Cons:
- Requires 220V
5) VIVOHOME MIG Welder 130 Flux Core Wire Automatic Feed
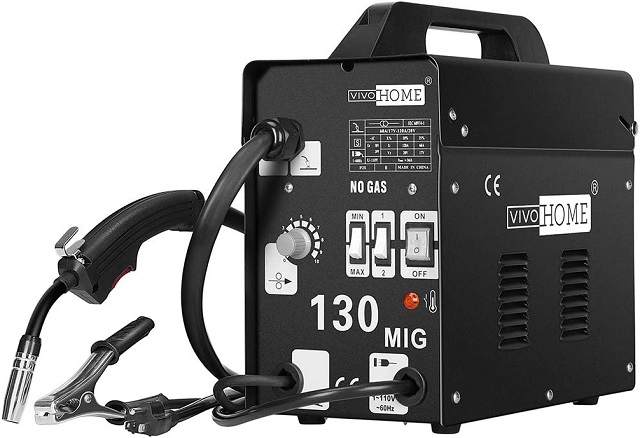 Description: The model might not have so much versatility, but its price is meager. Besides, the simplicity can make it an appealing option for those who occasionally purchase a tool.
Features:
Voltage: The product uses flux-core, enabling you to weld outdoors. Besides, you can run it on a standard 110V supply.
Thickness: Its controls are simple but easy. 3/16 inch is the maximum weld thickness in steel. But unfortunately, it is unable to weld aluminium.
Portable: The product is portable because of its 36 pounds weight. In addition, it doesn’t require a gas bottle. Regarding long-term durability, feedback from the person is largely positive.
No Reaction: The product can stop oxidation of the welded part using the flux-cored wire, which is simple to use. It is ideal for home repairs and hobby projects on light gauge steel. It is suitable for projects of mild steel and stainless steel. In addition, it can provide a professional finish for any thin steel welding or auto body work required.
Welding speed: The model comes with four current flow settings. Besides, you can manage the current also. In addition, it has 10-speed variable feed controls.
Accessories: The package comes with almost all items required. For instance, it has a 6.6′ welding gun with on/off safety control; a 4.9′ grounding clamp; a welding helmet; a wire welding brush; a 0.03″ (0.8mm) Flux core wire; and several other small accessories.
Pros:
- Flux-core simplicity
- Household power
- Low cost
Cons:
- No gas option
Best MIG Welder Buying Guide:
You should consider the factors before buying the correct one.
Power, Voltage, and Amps:
Voltage (V) represents the power required to operate. Generally, Entry-level equipment is rated at 110V, indicating that you can connect it to any household socket. You may find the label stating it at 115 or 120V, but there is no difference in practical terms. You can use the 220V option, marked as 230V or 240V, and professional-standard equipment. But, You have to use a generator, in this case for site work or a dedicated socket in the workshop. Dual-voltage products allow switching between the two, though they generate full power at the lower voltage.
Amperes (A) means “amps,” representing the current available for welding. When the amps are higher, the machine can handle thicker material.
Material Thickness:
If you use a 90A machine, it can weld steel up to ⅛ inch thick. On the other hand, a 200A product can weld ⅜-inch steel. But the latter might require a 220V supply to weld this thickness. Therefore, you must consider amp and voltage figures as a buyer. In this case, you can get relevant information from manufacturers.
The thicknesses are the maximum available in one pass. But these are not always as restrictive as they appear. For instance, you can weld two sides of an item to join greater thicknesses. Ensure that you have understood the techniques correctly. If necessary, you can take a beginner course. There is a misconception that these weld thicker aluminium as it is a softer metal, and the thickness can be decreased by around 20%. Hence, the reason is that aluminium absorbs more heat than steel.
Duty Cycle:
The best product can’t run continuously at full power, requiring frequent breaks to cool down. The duty cycle is a product’s runtime without stopping, expressed in 10-minute percentages. Consider the factor before buying your model. Otherwise, it can cause severe damage to the machine.
For instance, when a duty cycle is 30 %, it can run for 3 minutes. Then, it requires 7 minutes of rest. Sometimes, the duty cycle is not quoted at full power. For example, some 140A (amp) models quote the duty cycle at 90A. It is essential because the duty cycle is less while running at the full 140A. The duty cycles run from 20 % to 60 %.
Gas or Gasless and Portability:
The process needs a shielding gas to make a protective bubble around the weld. Thus, it helps to stop impurities in the air from weakening the weld. These machines use a combination of argon and Co2 also. However, you can use carbon dioxide on its own a few times. Gas bottle sizes vary, but most products are 4 feet tall.
Gasless models that use a flux-core wire are an alternative. The reason is that the product can make its shield as the wire melts into the weld. You can use the procedure outdoors as the wind can disturb a standard gas shield. But flux core creates more smoke, an unpleasant smell, and a coarser weld. The weld may be very powerful, but it might need more work to clean up. In addition, flux-core wire is only available for mild steel.
These machines are available as gas, gasless, or both. Gasless models are more transportable and don’t need a gas bottle. You can use carts to mount a model and gas bottle. Although these add maneuverability, they are neither small nor light. Ensure that you consider the weight that varies from under 20 pounds to over 70 pounds.
Wire-Feed Speed and Settings:
In this process, you need to melt a wire to join two pieces of metal. Hence, the wire type has to be appropriate for the metal type. According to the fact, you will require different wires to weld steel, aluminium, copper, etc. However, remember that the diameter of the cable also varies because it connects to the metal thickness. You can get charts available widely.
Feed speed is available in inches per minute (IPM) but in yards per minute a few times. If it has a more excellent range, it will be more flexible to match the feed rate to the skills. These come in several fixed speeds. But the best MIG welder always provides multiple variations in speed.
Additional Features:
These have a gas regulator to control flow. You should buy one and the gas if you don’t find it included. A few models have a welding mask that is sufficient for occasional use, and if you use it frequently, you may need to upgrade.
Precautions:
You must treat the best MIG welder with caution. These are some points you should follow to avoid accidents.
- Whenever you use your product, ensure that you should know their working and setup process. Advancing from expert guidance is recommended if you are new in this field. For example, you may take classes or take assistance from a professional while learning the basics.
- Sparks and spatter (molten waste metal) are not suitable for our skin, and these can burn it, even our clothing. So, you need to wear the correct protective clothing.
- You should make sure that the kit offers a wearable mask.
- Hence, the brightness causes a condition called “welder’s flash” or “arc eye.”
- Moreover, you must ensure that the area is ventilated, primarily whether you use flux-core wire.
- You have to clear the area of flammable material. Hence, your task is to invest money in a fire blanket or extinguisher.
- Keep in mind to stay entirely focused.
Conclusion:
We have given all the necessary details related to the best MIG welder. MILLER ELECTRIC MIG Welder gets the top rank hence. It is simple to use and an excellent choice for professionals.
Frequently Asked Questions:
- What is a MIG welder best used for?
If you’re a beginner, it is ideal for you. It comes with versatile tools. In addition, you might use these for different metals. However, these are perfect for steel.
- What’s the difference between MIG and TIG welding?
MIG welding needs a metal filler wire, whereas the other uses a non-melting electrode to fuse the two pieces directly into each other. As a result, MIG welding is a quicker method, but TIG welding is neater.
- How do you set up a MIG welder?
Remember that you will require some elements, including the voltage, wire-feed speed, and gas supply. Actual settings vary depending on the metal you use and the machine’s capability.
