


Best Trail Camera
Nowadays, doorbell cameras like the Ring have become very popular. That’s why most people are well familiar with the functionalities of the trail cameras that have been used by hunters for decades. As the cameras are triggered automatically & create little noise, these are the best options to use if you want to spot jumpy characters like intruders & wildlife.
Over the last few decades, trail cameras have evolved significantly from expensive products that are used by antler-obsessed hunters into consumer products that can be used easily for hunting, security & wildlife observation. Newer models have begun adopting different features that are available in the doorbell cameras. For instance, these cameras are able to instantly capture images or directly live stream to your phone.
If you want to choose the best trail camera, you need to determine where you should use it the most, when and why, & how important the picture quality is to you. In order to guide you in selecting the right trail camera according to your requirements, we have highlighted the key features you need to look for, along with mentioning the top 3 best trail cameras.
What is a Trail Camera?
A trail camera is a type of camera that photographers place in areas where the photographer generally will not be at the camera to snap the shutter.
How to View Pictures from Trail Cameras?
If you are willing to view photos from a trail camera, you have to follow these steps:
- Your first task is to remove the available SD card from this camera.
- Then, you need to insert your SD card into an adapter or a card reader.
- After that, your task is to connect the adapter or card reader to your computer.
- Now, you have to locate the SD card after opening the file explorer.
- You have to move to the folder which contains the trail camera pictures.
- After that, you need to double-click on your preferred image to open this.
Alternatively, there are a few trail cameras that include a default screen. It enables you to view pictures directly on the camera. Hence, you have to turn on the camera first, and then you should move to the pictures folder to view the photos.
-
Connect Camera To Computer Via USB Cable:
Connecting the camera to a computer through a USB cable is the simplest process of viewing pictures from a trail camera. Most models are available with a USB cable, which you are able to use to transfer images from the camera to a computer. As soon as you connect the camera to the computer, you will find this being recognized as an external storage device. Then, you are capable of accessing the photos which are stored on the camera.
- In order to view the photos, first, you have to open the folder where you store the photos.
- Then, double-click on the image files so that you can open them. Image viewing software like Windows Photo Viewer or Adobe Photoshop can also be used to view and edit pictures.
You must know this factor that a few models might need specific software that you need to install on the computer before you connect them to view the picture. We recommend checking the user manual or website of the manufacturer for particular instructions that let you know how you are able to connect and view pictures from your trail camera. A few trail cameras come with default screens where you can view pictures directly on the camera. There are a few newer cameras that come with wireless connectivity. It enables you to view photos on a tablet or Smartphone using a dedicated app.
-
Use An SD Card Reader To Transfer Files:
The simplest process through which you are capable of viewing a trail camera is using an SD card reader that helps you to transfer the files to your computer. Most of these models have SD cards that store photos & videos. Therefore, an SD card reader is something you need through which you are able to connect to the USB port of your computer.
If you are willing to view the images, your task is to insert the SD card into the card reader. Thereafter, you need to plug this into your computer. The computer has to recognize the card, and then it will let you access the files. After that, you are able to view the photos & videos. Even saving these to the PC is possible, or you can share them with others. You need to note that a few trail cameras need specific software using which you can view the files.
Therefore, you should ensure that you check the website of the manufacturer for any important updates or downloads. In addition, a few newer trail cameras might come with wireless capabilities, which make it possible to view photos & videos from a tablet or Smartphone directly. Above all, it can be said that using an SD card reader is an easy process to transfer files and view pictures from the camera you are using. So, you will be capable of accessing & enjoying the amazing wildlife that you have captured using your camera.
-
Install Camera Manufacturer’s Software:
Installing the camera manufacturer’s software is one of the simplest methods to view pictures from a trail camera. Trail cameras mostly have software that you can install on your mobile or computer. The software lets you view as well as manage photos & videos that the camera has captured.
In order to install the software, your job first is to insert the CD, which includes the camera, into your computer. After that, you need to follow the instructions. Whether your trail camera does not have a CD, downloading the software from the manufacturer’s website is usually possible. As soon as you install the software, you are able to connect the camera to the computer through a USB cable.
It is important for the software to detect the camera automatically. Then, it will let you view the photos & videos stored on it. The software can also be used in order to adjust the camera settings, like the time and date. In addition, you can use the software to download pictures & videos to your computer.
Software Drivers:
A few trail cameras might need extra software or drivers, which should be installed before you use them with your computer. Besides, you should ensure that you are checking the manufacturer’s website for any updates or any extra software you need. While you can use the manufacturer’s software, you are also able to use third-party software options in order to view & manage trail camera pictures.
These software options are capable of offering extra features & functionality, but these can be available at a cost. Above all, it can be stated that you can install the camera manufacturer’s software to view photos from your trail camera. Once you install the software, you are able to manage & download photos & videos. In this way, you can adjust your camera settings as required.
4) Use Photo Viewing Software On the Computer:
If you are willing to view photos from the trail camera, you can use photo-viewing software on the computer you are using. It is one of the simplest and most effective ways to view pictures from this camera. You can see that most models come with a USB cable letting you connect the camera to your computer. As soon as you connect them, you are able to use the software in order to transfer photos to the computer from the camera. Several photo viewing software options are available for free, like Google Photos, Windows Photo Viewer, etc.
With the help of these programs, you are capable of viewing, organizing & editing photos of your trail camera. Photoshop Adobe Lightroom, or other more advanced software, can be used to edit your pictures along with enhancing the quality. Using a mobile app is another way to view trail camera pictures. Nowadays, many cameras have mobile apps enabling you to view photos directly from your tablet or Smartphone.
Whether you are willing to check your trail camera photos while out in the field, it is a convenient option. Along with using mobile apps or photo viewing software, viewing these photos is possible on the default screen of the camera. However, the option is available only on higher-end trail cameras. It isn’t as easy to use as using a mobile or computer. So, it can be said that one of the most convenient ways to view photos from a trail camera is to use photo-viewing software on your computer. By following some simple steps, transferring the photos is possible to the computer. Then, you can start organizing & editing them as you prefer.
Does A Trail Camera Need Wi-Fi?
These cameras do not need Wi-Fi to function. The design of the camera allows you to capture photos or videos of wildlife in remote areas where no access to the internet is there. Most models store the pictures or videos on your memory card. You can remove and view them on your computer or other devices. But a few trail cameras have WiFi capabilities, letting you remotely access the videos or photos that the camera has captured using your Smartphone or other devices. It will be beneficial when you want to check the camera’s battery level, adjust settings, or view photos or videos in real-time. However, you should remember that Wi-Fi is not a must-have requirement for a trail camera to function properly.
Wireless Connectivity:
Wi-Fi is not essential for a trail camera to function properly. But these modern cameras have wireless connectivity options, letting them connect to cellular or wifi networks. With the help of these features, you are able to remotely access the camera’s footage & settings from computers or Smartphones. In these cameras, wireless connectivity has become popular in recent years because it can provide multiple benefits to people. For example, hunters & wildlife enthusiasts can monitor the wildlife habitats or hunting grounds remotely, and in this case, they don’t need to physically visit the place.
It is possible to use the feature to receive real-time alerts & notifications once the camera captures any footage or detects any type of movement. However, you must know one thing: the wireless connectivity feature may be available at an extra cost. You might have to buy a separate data plan or subscription in order to access the remote features of the camera. In addition, the constant wireless connectivity can affect the battery life of trail cameras. Hence, as a user, you may need to replace or recharge batteries more frequently.
In summary, when wi-fi is not a must-have requirement for your camera to function, wireless connectivity options are popular in modern cameras. You can get multiple benefits from this feature, but it is available at an extra cost. Besides, the battery life can be affected.
Cellular Trail Cameras:
In order to transmit videos & photos to your device, these cameras need cellular networks. These types of trail cameras use a SIM card & a cellular network for sending videos & photos to a computer or phone. It indicates that you don’t have to present physically at the camera location to retrieve photos & videos.
On the flip side, traditional cameras don’t need Wi-Fi or cellular networks to work properly. These allow you to store photos & videos on an SD card. The stored photos & videos are possible to be retrieved by navigating to the camera location physically and removing the SD card. In recent times, these trail cameras have become very popular because of their convenience and simplicity of use.
So, using these models, you are able to monitor your hunting or wildlife observation locations remotely. And there is no need to visit the site physically. In addition, these types of cameras come with better photo & video quality than traditional trail cameras. The reason is that advanced technology is used by them to transmit videos & photos. So, at last, it can be said that to monitor hunting or wildlife observation locations remotely, the most effective way is using a cellular trail camera. But a traditional trail camera is a far better option whether you are willing to retrieve the images and videos manually.
-
Non-WiFi Trail Cameras:
Trail camera allows you to capture photos & videos of wildlife. This tool is beneficial for researchers, hunters, & wildlife enthusiasts. WiFi is not a must for a trail camera to function. You should know that most of them don’t come with WiFi capabilities.
The design of non-WiFi trail cameras lets you capture photos & videos, and store them on a memory card. After that, you can remove the memory card from the camera. Then, you can view the photos & videos on your computer or other devices. There are a few trail cameras that come with a default screen. It lets you view the photos & videos directly on your camera.
These cameras are often more budget-friendly in comparison with WiFi-enabled trail cameras. As these don’t need a smartphone app or a WiFi connection, they are simpler to use. But these also come with a few limitations. For instance, viewing images & videos is impossible in real-time. Whereas you are also unable to control the camera remotely.
But nowadays, the popularity of WiFi-enabled trail cameras have increased. With the help of these cameras, you are capable of viewing images & videos in real time. In addition, the camera can be controlled remotely using a smartphone app. However, often, these are costlier and need a WiFi connection. But the drawback is that WiFi connection is unavailable in remote areas.
So, we can say that a trail camera does not need a WiFi connection to work. Therefore, you can use non-WiFi trail cameras to capture photos & videos of wildlife. However, regarding WiFi-enabled trail cameras, you can get a few extra features that are useful for specific applications.
Remote Access:
Most of these cameras are capable of operating independently of wifi or other internet connections. The design of the cameras lets you capture photos & videos of wildlife as well as other outdoor activities, and then you can store the photos and videos on a memory card. After that, you can remove the memory card. Then, you can view photos or videos on a computer or other devices.
There are a few trail cameras that are capable of providing remote access capabilities. But these need wi-fi or cellular connectivity. With the help of remote access, you are capable of viewing photos & videos that the camera captures in real time from a remote location. If you are looking for monitoring wildlife activity, then this feature is useful. Besides, it is useful for security purposes.
Although this feature is useful, it is not a must for a trail camera to function properly. Several users like to use a camera that is simple to use so that they can operate it freely without any cellular or WiFi connectivity.
In addition, these features are able to add to the cost of a trail camera. It may need extra fees for cellular connectivity. Although wi-fi is not needed by a trail camera to function properly, a few models can provide remote access capabilities that need wi-fi or cellular connectivity.
Lastly, we need to say whether you want to buy a trail camera with remote access features or not — relies on your specific needs as well as your preferences.
How Far Can A Trail Camera Take A Picture?
A normal trail camera’s range is from about 20 to 130 feet. However, the range can vary in different models and brands. If you want to capture something that is further away from the camera, you should wait until the camera takes several pictures, and one of these pictures is near the target. Generally, trail cameras can capture photos of humans and animals that are nearby. But these can’t capture images that are farther away.
Tips To Set Up A Trail Camera:
These cameras are the best option to capture wildlife images. However, there are some things you should know to get the most out of them. These are a few tips to set up and use your trail camera:
- Consider The Location Of Your Camera:
You need to ensure that you have placed the camera in a location where you can see different activities, such as near a stream, in a wooded area, or on a hilltop.
- Choose The Type Of Camera You’re Using:
A digital trail camera allows you to capture pictures with little delay. At the same time, an infrared trail camera is able to snap pictures in complete darkness.
- Choose The Right Lens For Your Camera:
A wide-angle lens is able to capture more of the landscape in front of the camera. At the same time, a telephoto lens is used to zoom in on wildlife in close proximity.
- Get Familiar With The Settings Before Each Outing On Camera:
If you change the settings, it will impact how your photos can be turned out. Ensure that you read through the manual before every session. If you wish, you can add sound to the photos with a sound activator option or a motion detector. It enables you to identify animal behavior in the pictures.
Mistakes To Avoid When Shooting Pictures With A Trail Camera:
These cameras are useful when it comes to taking wildlife pictures. But like other cameras, you can improve them with some simple precautions. These are a few mistakes that you should avoid when you plan to shoot photos with your trail camera:
- Shooting In Low Light Conditions:
The design of the trail camera’s lens lets you capture good photos in bright sunlight. But it will face difficulties in low light conditions in order to capture good pictures. Hence, you should shoot during the morning or evening when the lighting is better.
- Shooting Without A Tripod:
A tripod is important for those who are willing to take sharp images with a trail camera. In this case, you should make sure that the camera stays still while taking your picture.
- Shooting In The Wrong Position:
Sometimes, you may not be able to guess the exact location of an animal. Therefore, you should ensure that you shoot from a position where you are able to capture their image. You need to shoot along the edge of a hill, or you can go behind some trees for shooting.
- Focusing On The Wrong Thing:
People usually focus on those things which are not so important. It is one of the common mistakes that people make when they take pictures with their trail camera. You should focus on the animal.
Do Trail Cameras Work At Night?
Trail cameras work around the clock with an integrated flash or night vision in order to record nocturnal creatures in low light. The cameras are durable and can be used outdoors with a rugged housing, letting the unit endure exposure to the elements.
How Do Trail Cameras Detect Motion?
It includes a PIR or passive infrared sensor, which is used to detect heat & motion. Once an animal walks in front of the PIR sensor, the camera is triggered by the heat to snap a photo. After that, this PIR sensor is able to detect anything that is warmer than the surrounding temperature.
How A Trail Camera Works:
People use these cameras to monitor any particular location within the field of view. As these are powered by AA batteries most commonly, they are unable to record non-stop. Besides, they use memory cards with finite storage. Batteries would deplete within some hours if they did.
If the trail camera is available in a standby mode, the motion sensor can monitor constantly for movement. You can use a solar panel to recharge the batteries. In this case, once an animal crosses in front of your trail camera, the infrared flash & activate.
It is why the game camera switches to standby mode once the user has activated it. The PIR motion sensor works in this standby mode. Once the sensor detects any type of change in the thermal image within its field of view, the camera will turn on. Then, it will take pictures or record videos. After that, it will switch back to standby mode.
How A PIR Motion Sensor Works:
Trail cameras are sensitive to moving heat. If any living thing moves in front of the camera, it will trigger. If you are willing to avoid empty shots and false alarms, you should know about the working procedure of a PIR motion sensor in detail.
This sensor denotes a passive sensor sensitive to infrared radiation. Generally, in comparison with visible light, infrared radiation has a longer wavelength. Therefore, the human eye can’t detect this. Usually, people perceive this as heat in regular life. These cameras perceive heat. And all credits go to the PIR sensor. These are able to detect any living thing while moving in front of them.
Generally, warm objects are able to emit infrared radiation. And animals or humans play such roles in nature. However, it may be twigs that the warm air or the sun heats. For instance, if these cameras are static and installed on a tree, the PIR sensor has to evaluate changes in the intensity of future infrared radiation in various parts of the observed scene. Suppose an animal walks in front of your camera, and trees behind it are heated to air temperature.
Then, the sensor registers a temperature change between the environment & the animal’s temperature. After that, it will go back to the environmental temperature. Next, the sensor is going to evaluate the degree of change. If it crosses a certain value, the camera will switch to active recording mode from power-saving sleep mode. Differences in captured temperatures in various locations of the observed area are evaluated by the trail camera as an alert. Then, it starts capturing photos or recording video.
Capturing Animals Of Various Sizes:
The PIR sensor can never distinguish the animal’s size. It can see the thermal maps only. It indicates that a squirrel or mouse will be able to trigger it, just as a large deer that is much further away will be able to do so. The important thing, which matters the most, is the amount of heat that reaches the sensor. When animals are too far away, trail cameras are unable to thermally distinguish them from the environment. So it will not trigger.
Maximum Range Of The Trail Camera Motion Sensor:
Based on the PIR sensor’s principle of operation, the maximum range at which a trail camera is able to detect can rely on two main factors:
- Size of the animal or person (the area emitting IR radiation)
- Thermal contrast compared to the surroundings
Trail camera is able to be triggered at 30-40 meters distance or 100-130 feet, when the animal is large & the environment is cold. You can take an example in this case, like there is a heated deer in a rut during a cool morning. Suppose the size of the animal is small and the temperature of the environment is almost the same. In that case, you will find trail cameras triggering late or not at all. These conditions can occur during hot summer days when the environment & air temperature are the same as the animal’s surface temperature.
PIR Function
Most cameras let users set the sensitivity of the PIR sensor in two or three levels so that they are able to adapt to the seasons & animal size they are willing to capture on the trail camera. According to the principle, if the PIR sensitivity is lower, the distance will get shorter when the trail camera captures the same animal. Remember that it relies on the environment, temperature, and other circumstances.
Whether you expect large animals like deer or wild boar in front of your camera, you are able to set a low PIR sensor sensitivity. Large animals will be able to still trigger the camera. You will not have at least a full card of birds or mice. When it comes to medium-sized animals like roe deer, fox, etc., you need to set a medium motion sensor sensitivity. However, in order to observe small animals like small birds, squirrels, & hedgehogs, you are required to set the highest PIR sensitivity in the menu.
Sun, Wind, And Branches— The Most Common Causes Of False Alarms:
In trail cameras, based on the principle of operation of the PIR sensors, you can say that there are situations that are able to “deceive” them. Always keep in mind that these cameras never see the world like people see. So, it becomes challenging to distinguish whether a moving animal is warmer than the surroundings or only a leaf heated by the sun that is warmer than the surroundings.
Sometimes, you can face situations where users complain about their cameras that the product is faulty. The reason is that it can capture multiple pictures every day, yet no animals are there in sight. You can find the issues causing such situations upon visiting the site where this camera was placed:
Vegetation like leaves, grass, and branches are near the trail camera (within 10 feet), which can warm & move during windy & sunny weather. This camera is used to interpret this as motion, which can cause this to trigger continuously.
A large surface area in front of the camera is oriented southward & heated by the sun. Warm air & heated objects that are rising from this can emit infrared radiation to which the motion sensor is sensitive. Once a gentle breeze moves the warm air, these cameras are able to interpret this as a movement.
Sun is a major source of heat, and it shines directly on the trail camera. So, if you set up the trail camera in a way that it can face the sun at any part of the day, rays of light will pass between grass, clouds, or branches, and cause the camera to trigger on its own.
Trail Cameras May Miss Fast Movements:
Another thing that you need to consider is to better understand how a trail camera works. These cameras usually are consistently in power-saving mode in order to conserve battery life. Therefore, it completely wakes up once it detects motion. As a result, the camera will wake up too slowly. So, when the camera starts capturing, the animal could be out of the frame. And it is true for slower trail cameras & fast-moving animals. There are several trail cameras that might need more than 1.5 seconds to trigger. However, there are some models having a trigger speed of 0.12 seconds that break the record.
If you have a slower trail camera, you should place it in a place where the animal can linger longer, like a food source, water, or a resting spot. However, when an animal spends a few minutes in front of your camera, it doesn’t really matter if the trigger time of the camera is longer or shorter. Conversely, deploying faster trail camera models is possible even in those places where games run by easily, as these trail cameras still will be able to capture it.
Motion Sensor “Sees” Differently Than a Camera:
With a trail camera’s motion sensor, the key thing you need to know is that it includes a detection angle and a certain range. The fact is that you can see something in the resulting photo, but it never indicates that the trail camera features motion detection at that spot. The reason is that the PIR sensor follows a different technological principle than the camera, and it has a specific range.
Whether the animal is so far away that you can’t detect the motion sensor, the trail camera will not be able to record anything. If you look for fresh tracks at a spot that you can see in the photos, but it is unavailable in the range of the motion sensor, you will feel that the trail camera isn’t working. Now, you have faced the trail camera’s technical limits. So, you need to try to boost the PIR sensor’s sensitivity in the menu. Otherwise, you need to move the trail camera closer.
This sensor can come with a wider detection angle compared to the field of view of the camera. It is mainly used in order to provide the trail camera sufficient time to trigger.
In some cases, the trail camera may trigger, but nothing is there in the shot — it may happen that the animal entered the detection angle of the PIR sensor, but stopped, or turned around. So, it didn’t enter the field of view of the camera. Cameras with extra motion sensors usually face such situations. It allows the camera to detect animals early, the result of which you may need to see black pictures & false alarms.
How The Night Illumination Of A Trail Camera Works:
After activation of the motion sensor, these cameras are able to determine the difference between day & night. Hence, it uses a camera itself or a lux meter, which is used to measure the amount of light. Whether it triggers during the day, it will start taking pictures or recording videos. When these cameras are activated at night, these will power on the night illumination in order to enlighten the scene in front of it.
Three-night illumination types are available in trail cameras. Each type includes its benefits & drawbacks. Based on the technology you are using, you can distinguish between:
Visible Infrared Illumination (Red Glow):
This type of illumination is available with an 850 nm wavelength, and labelled as Red Glow. It is capable of emitting both visible & invisible spectra in order to deliver a more illuminated scene.
But the drawback is that trail cameras can emit a red light, which humans can see. The wavelength of red color is 630-780 nm, which is closest to the illumination wavelength of 850 nm at the visible spectrum’s end. People are able to view the night illumination, the result of which they can find the location of the trail camera. Moreover, animals can also view the illumination, which may scare them off.
These drawbacks make sure that you should avoid visible IR illumination in practice. Instead, you should use this camera with invisible illumination. This type of illumination can be available in cheap trail cameras & mini trail cameras. In order to reduce the cost of production, manufacturers made this compromise.
Invisible Infrared Illumination (No Glow):
The wavelength of this illumination is 940nm. It can emit a spectrum that is invisible practically to the human eye. So you will not see the trail camera flash at night. Otherwise, you are able to see this flashing very faintly when you are very close. Animals could not see this. As a result, they will behave naturally.
White Flash & Colorful Night Photos:
A few cameras include a white strobe flash, such as a camera or mobile phone flash or white LED diodes, allowing you to illuminate the nighttime scene. Humans can see the illumination. Therefore, it can reveal the trail camera easily to a person. Most animals barely react to this because it is similar to the flash of lightning during a storm.
Switching Between Day And Night Mode:
Apart from the visible color component of light, you should know that there is IR radiation more or less in the environment. Standard photo & video devices like cameras, mobile, video cameras, etc., come with image sensors. These sensors are sensitive to such infrared radiation. These might capture false colors without the IR filter’s modification, and the colors look different from the way the human eye sees them.
If you want to have accurate colors, remember that these cameras require an IR filter in daylight mode in front of the sensor. It is used to filter out IR radiation, and lets visible light through. When you shoot at night, you need to remove the IR filter in order to let the trail cam view the scene illuminated by the night light.
The solution is easy despite causing some issues. You can switch the IR filter, but it depends on whether the camera is shooting during the day or at night. Based on this, the IR filter is activated or deactivated. Remember that the switching will happen when the camera shot in another mode—
- After daytime photos – just before the first-night photo,
- After-night photos – just before the first daytime photo.
The click causes a few sensitive animal species to notice the trail camera despite it having an invisible illumination. The reason is that the sound of the IR filter switching alerts them in front of the flash of illumination.
However, there can be an exception. For instance, a trail camera may have two lenses and two sensors where one sensor is for daytime mode & the other sensor is for nighttime mode. These may come with an IR filter, which is permanently defaulted for the daytime sensor. It means that they are unable to click on the first night or daytime photos.
How Cellular Trail Cameras Work:
As soon as the motion activates the camera or turns on the night light, the camera will start capturing pictures or recording videos. But it relies on the settings which you have selected in the menu. You can see the resultant pictures & videos stored on the memory card. If you wish to check the camera later, you are able to see the photos directly on-site.
A few trail cameras have a GSM module, which means there is a device that is capable of connecting to a mobile network like a cell phone. People often call them Cellular Trail Cameras, 4G trail cameras, GSM trail cameras, or sending trail cameras.
These often come with a relatively large & visible antenna, allowing you to connect in areas where the signal is weak. When you insert a SIM card into them, the cameras enable you to send the captured photos virtually in real-time. It depends on you if you are willing to select to send via emails to the computer or cell phone, via MMS messages to the cell phone, or via mobile data to the cloud, from where viewing them is possible on any device.
Transmission Modes
While there are different transmission modes— email, MMS, cloud, these cameras have many common characteristics & limitations. Initially, you should know that users have to set up a connection to the mobile network. However, it varies, depending on the operator, SIM card provider, mobile services, & the model of the trail camera. Its manual setup to the correct values is relatively complicated. They can detect the provider automatically depending on the inserted SIM card and set the necessary things. What you should do is in the menu, you have to select the procedure through which you send & set one or several recipients.
Whether you purchase a trail camera abroad, it cannot recognize the operators. So, you need to set the detailed values manually in the menu. Ensure that you remember these things when you select a trail camera.
What Are The Benefits Of Cellular Trail Cameras Vs. Wi-fi Trail Cameras?
You can easily select the type of trail camera you should use when you compare the advantages of these two models. Look at these benefits of Cellular trail cameras and Wi-fi trail cameras to find which one will be the best one according to your requirements.
Benefits Of Cellular Game Cameras:
There are several reasons why hunters & wildlife researchers prefer using cellular trail cameras. These devices are beneficial for monitoring activity on trails.
The advantages of a cellular trail camera are as follows:
Great Connectivity:
These cameras can give you instant access to photos. Thus, you are able to save your time. You can use these trail cameras in different places that are far from your home and without Wi-Fi access. You can prepare for hunting trips in a better way.
Quality Photos:
These are able to capture awesome images & videos and send them to the smartphone. As the cameras provide top-quality images, you can easily differentiate animals and their activities in the area.
Less Intrusion:
You can also check pictures & videos of wildlife using cellular cameras, and you don’t need to visit the camera location regularly. It limits your scent in the area and allows animals to visit without any distractions.
Check The Camera Any Time:
These allow you to monitor your hunting sites or animal observing areas while sitting at home. For instance, when you are running errands or on a break at work, you can do so. Moreover, you will get to know if your camera is operating properly and securely still now in the location you placed it.
Efficient Battery Use:
These let you change camera settings remotely from an app to conserve battery life. Solar panel power options can also be used to keep the camera running longer.
Benefits Of Wi-fi Trail Cameras:
Like cellular cameras, these types of cameras can offer similar services. However, Wi-Fi trail cameras’ benefits are more limited for hunters or wildlife researchers as they are willing to access cameras from remote locations. When you use such a monitoring device, the capability of viewing trails far away from wireless connectivity will be reduced. Otherwise, it will prompt you to visit the trail regularly to see the animals that are passed by.
These are useful for homeowners who are willing to boost the security of their property. So, if you are one of those who want to place your device near your home, it is a great choice. Cellular trail cameras are a better choice for remote locations.
Are Cellular Trail Cameras Worth It?
Using trail cameras can give you optimal connectivity as well as access top-quality pictures for improving your hunting or further researching into animals in the area. These are a few benefits you can get by buying a cellular trail camera:
Save Time:
People usually use many trail cameras in order to monitor trails or hunting areas. These cameras make it simple to check each camera whenever you want without the need to visit every camera location.
Spend Less Gas Money:
These cameras ensure that you are able to save money that you need to spend for traveling to camera sites in order to pull SD cards. It is a useful advantage with the price hikes of gas.
Always Access Photos:
These types of cameras can give you cloud-based storage options & automatic access to all the available trail pictures. Thus, you can make sure that you will not miss a single movement of any animal on the trails. There are various data plans letting you store specific images which you can access at any time.
Top Three Best Trail Cameras:
Tactacam Reveal X Pro— Best Overall:
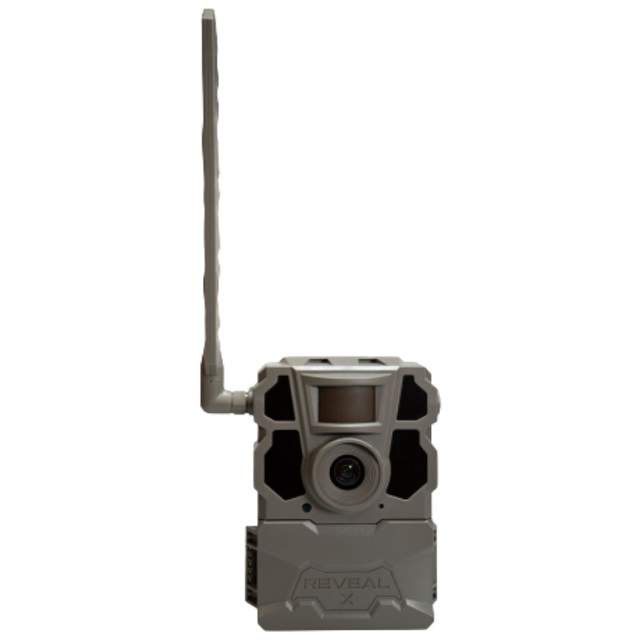 Description: Among all the popular models of Tactacam’s trail cameras, Reveal X-Pro is the most recent addition. With the help of the new default LCD screen, you are able to set up the model more easily when you compare it to the remaining ones of its line-up.
Features:
Easy To Set Up:
You only need to turn on the camera. Then, you should frame your images by using the LCD screen without the guesswork of the snapping test shots. As a result, it becomes virtually impossible to miss your target within the camera’s field of view.
Multiple Optional Accessories:
This model offers several new solutions with an integrated solar panel, rechargeable lithium cartridge, and other optional accessories in order to extend the battery life of the camera. Because of a few functionalities like optional password protection, and a default GPS, the model becomes an excellent option for those who are concerned about trail camera thieves. In addition, it can run a single cable lock through the camera body.
Top-notch Image Quality:
Tactacam’s models are popular for offering top-notch image quality. What makes this model special is that it is able to capture even nighttime images at 110 feet. The shutter snaps of the camera with the stop-motion speed are capable of delivering superior detail at night.
Besides, the daytime images usually are clear & vibrant. Users can adjust the camera settings to retrieve HD videos with audio on-demand through the Tactacam Reveal app.
Pros:
- Simple to set up
- Awesome image quality
- Exceptional battery life because of the solar panel & rechargeable lithium cartridge
Cons:
- Cell data plans are costly per camera
- It needs a class 10 U3 SD Card (16GB-32GB)
Moultrie Mobile Edge— Best app:
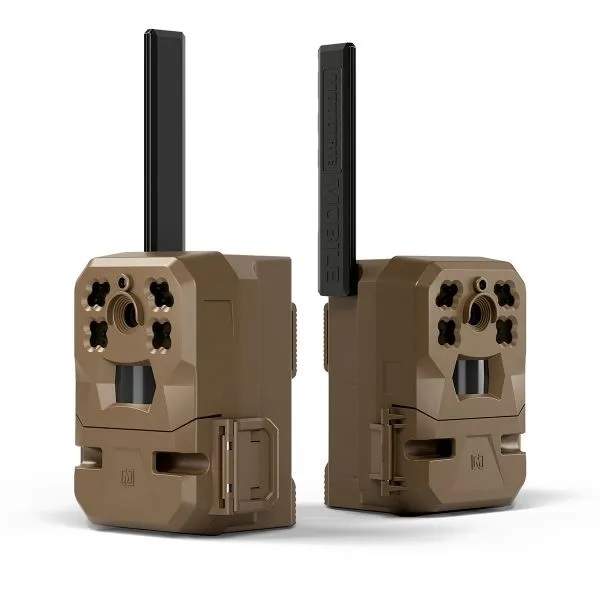 Description: If you are looking for a trail camera that can take solid pictures during the day & even at night, then the Moultrie Mobile Edge is the one you will require. What makes this model exceptional is all the features that it includes in the table via its Moultrie Mobile app. You can find the Edge connecting automatically to the most powerful network in the area, and you don’t need to switch sim cards. Besides, Edge helps to promptly send images to your phone.
Features:
Image Recognition:
As the Moultrie Mobile app comes with an image recognition design, it is able to identify turkeys, deer, vehicles, humans, etc, in photos. You are able to sort your images from there depending on various filters to put together the patterns of the deer in your area.
Pattern Deep Activity:
Its slightly slower trigger speed is one of its downsides. Although it sometimes misses to catch at the 60-foot range during the daytime, its performance is good at night. The camera can produce solid nighttime images. Its slower trigger speed never affects the camera in the field.
It has 16 AA Batteries, and the trigger speed is 0.85 seconds. 80 feet is the advertised detection range. In addition, it has free unlimited cloud storage.
Pros:
- Simple-to-setup
- Affordable
Cons:
- Slower trigger speed
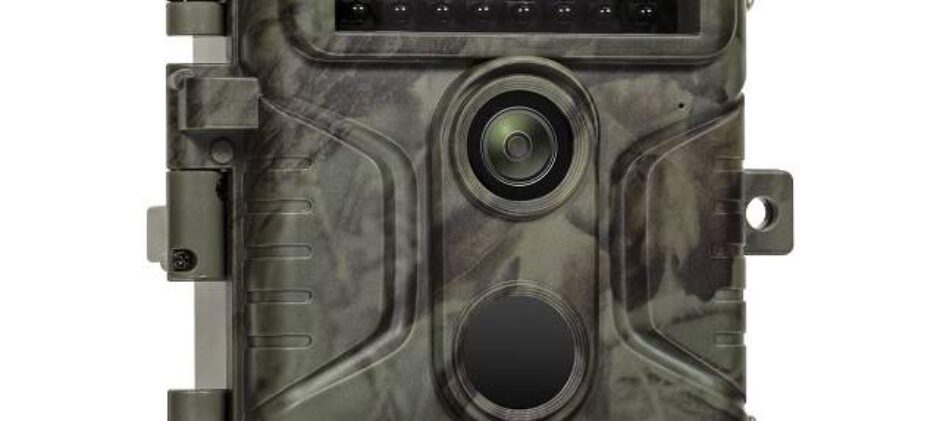
GardePro A3S— Best Model for Your Buck & Best Nighttime Detection:
 Description: If you are looking for a trail camera at an affordable price range, then you can go with this model. GardePro A3S is capable of providing top-notch nighttime detection. It is likely to be the only camera that can sense movement at 100 feet during both day & night. This model includes one of the largest detection zones among the models that we have tested, which makes GardePro A3S a great choice for nocturnal wildlife detection at longer ranges.
Features:
Great Photo Quality:
This product is able to provide exceptional image quality with up to 48MP photo resolution options. With the help of the hybrid mode, you can capture both photos & video.
Timelapse Option:
This camera includes a timelapse option,which allows you to schedule photo captures, without the animals passing close enough for triggering the camera.
However, the disadvantage is that this model did not consistently stop motion, and sometimes wildlife pictures get blurred. The wide-angle lens of the camera can excel when it comes to capturing close-up images. But if the subject is at a distance, it will look small, and even it might be lost by the impressive detail of the images, which will have a shallow depth of field.
Trigger Speed:
The product has a 0.1-0.6 seconds trigger speed. However, sometimes it can be found to perform below average. The recovery time is 0.5 seconds, which can leave big gaps in the movement. Therefore, you can hardly get 1-2 pictures of an animal as it will cross the screen. But its housing body & plastic cam strap buckle are less powerful than other models. However, in the price range at which it is available, you will be very impressed with the performance of the camera.
Pros:
- Large detection zone
- Infrared no glow flash
- Stop-motion images are quite impressive
- Outstanding motion detection at night
Cons:
- The buckle or camera body is not that much durable.
- Recovery speed is slower.
How To Choose The Best Trail Camera:
Networked Or Not:
Whenever you plan to choose the best trail camera in the market, the first deciding factor is whether your trail camera is able to connect to a cellular network or not. Nowadays, connected models are very common. This connectivity indicates that there is no need to visit your camera physically to check out the imagery it has captured. The feature is useful when you will place the camera in far-flung hunting spots. But it will be less valuable when you use the camera near your house. Besides, cellular cameras can be operated easily. The reason is that you can control most cell-connected cameras via your smartphone through apps.
You can use remote-control camera settings so that you can switch between photo & video modes by making adjustments in camera sensitivity. Moreover, it allows you to check battery levels.
People prefer to use networked cameras because these models are able to offer instant or at least frequent gratification from your cameras. But, a recurring data plan cost will be there, along with the setup complexity.
So, you need to ensure that you really need the connectivity. Besides, legal restrictions can be there on wirelessly-connected cameras, limiting how you are able to use them. Ensure that you double-check the regulations of your state before buying.
Trail Camera Prices:
Like other cameras which are used for photography, an expensive camera will be able to create a better image. In addition, expensive models will come with more features. Most hunters purchase the cheapest trail cam, and then replace these models each year or purchase one in the $100-$150 range. However, several great models are available in the $100-$150 range.
Exterior Color:
It may seem a minor detail, but several people are willing to use their trail cameras to capture their subjects without alerting them to the presence of the camera. Hence, the exterior colour of the camera may be a key factor. As most trail cameras are sold to hunters & used outdoors, these devices are available in camouflage patterns or solid earth tones.
Are you a hunter? Then, you may have a good sense that lets you know about the patterns which are the most appropriate for the area. If this is not the case, you need to snap a few images of the trunks of the trees where you want to mount the camera. After that, you need to compare these to the patterns on the cameras that you want to buy.
Megapixels And Picture Quality:
If you are a professional photographer & videographer, you must know that megapixels are not the last thing to be considered. These may be a decent clue to the image quality which you could expect from a camera. In addition, several other factors are there that contribute to the final image quality from your trail cam, like shutter speed, sensor size, trigger speed, pixel size, etc.
The most effective way to gauge the quality of this type of camera is to look at real images which you capture using them. You can check out online reviews on Amazon where you can see people have given the real pictures. So, in order to evaluate image quality, these are a great shortcut.
Cellular Trail Cameras And Hunting Ethics:
When it comes to using cellular trail cameras in order to hunt big game, there are a few controversies in the hunting community. Ensure that you check the local regulations before you purchase or use a cellular trail camera.
Trail Camera Flash— Low-Glow, No-Glow or White Flash:
Several benefits and drawbacks are there for every type of camera flash.
White Flash:
Several biologists and hunters prefer white flash, as it seems this flash spooks the animals less often. However, most trail cameras don’t have white flash.
Low-Glow:
These IR cameras can create a visible red glow from the infrared emitters at the time of taking a picture or video at night. Although the red glow is faint, it can be seen while looking at the camera directly. Such cameras can take superior night images than the no-glow cams. Several experts & hunters believe that deer may detect the flash.
No-Glow:
These types of cameras come with black filters over the infrared emitters in order to hide the red flash. The No-Glow cameras are called black flash cams. Humans or deer less likely detect such no-Glow cams at night. However, these cameras are unable to produce top-quality nighttime images.
Trigger Speed:
Trail cameras are motion-activated. Therefore, a fast trigger is a must. You must want your camera to snap a picture as fast as it can once the motion trigger is activated to capture the subject in the best possible way. Suppose a deer is running full-tilt past your trail camera. Now, if your camera takes almost a second to actuate, then it may happen that the deer didn’t appear in the frame of the camera. So, the acceptable time standard for shoot will be 0.5 seconds trigger or faster.
Initial Setup:
Users often leave the trail camera alone for days, weeks, & even months at a time. So, you need to check if the camera is set up accurately. While you need to select a location where your desired subjects could be passed through, you have to keep your camera in a position so that it can have a clear line of sight on a fairly wide area.
If you hide a trail camera in a dense thicket, it indicates that you can capture photos only when anything passes in front of the camera.
If necessary, you can experiment with your model to check if there is any technical problem. Sometimes, formatting your memory card has become important to save images & videos. It may happen that you saw a wrong date/time stamp and then realized that you have forgotten to set the parameters.
Use of Lithium Batteries
So, lithium batteries are recommended for use in trail cameras. When it comes to cheaper cameras, you can see that regular alkaline batteries do not offer sufficient voltage for the IR flash. Several times, a trail camera is unable to record video with underpowered batteries. Hence, alkaline batteries decrease in voltage once you start to use them.
Lithium batteries are able to offer higher voltage consistently, and can perform better in the cold.
Whether you set up a cellular trail cam, ensure that you should check signal strength in the area. If there exists a camera providing an app or website that allows you to see images on your smartphone, you should try to trigger the camera. Then, you need to see if you receive notifications & images.
Several trail cameras come with weatherproof functionality. However, it is still better to find a sheltered location. Remember that snow & rain can obscure your trail camera’s lens temporarily. As a result, the top-quality images that you have captured may be ruined. Besides, direct sun can hit your triggers, and will result in empty images. You need to avoid lots of plants in the immediate foreground. The reason is that wind-triggered movement from them also results in empty images.
The Bottom Line:
When you plan to buy the right trail camera, you may face difficulties choosing the right model. The reason is that multiple product specs, prices, customizable features, etc., are there to be considered. In this article, we have mentioned the top 3 best trail cameras, along with covering every detail that you need to know about these cameras. Still, if you have any doubts or queries, let us know via comments.
Frequently Asked Questions
What is the difference between a game camera and a trail camera?
Usually, hunters use the term ‘game cameras’ whereas the name ‘trail camera’ is used by scientists &
photographers. People also say ‘camera trap,’ referring both to this camera as well as to a device that is designed to trigger a traditional camera.
Are trail cameras worth it?
Yes. The trail cameras are excellent options for those who regularly rely on these models for hunting, wildlife watching & photography or are willing to boost home security.
What is the best deer bait for trail cameras?
Remember that location is more crucial compared to the brand of bait. But you should know that the best choice will be a combination of ground & whole chestnuts. You have to place this in a route where the deer has to go for camera positioning. Then, you have to place the bait to slow them in front of the camera.
